This is one of the most common maintenance questions in dust collection, and the answer makes a dramatic difference in how much downtime and labor you spend on it.
Let's compare the options.
THE SLOW WAY: VISUAL INSPECTION
The traditional method is straightforward — shut down the compartment, lock out the system, open the access doors, and visually inspect every bag for dust leakage on the clean side. You're looking for dust accumulation on the tube sheet around individual bag holes, dust streaks on cages, or visible holes and tears in the bags themselves.
This works, but it has serious limitations.
A crew of two people inspecting a 500-bag compartment will typically spend 2 to 3 days on the job. They're working inside the baghouse in confined space conditions — hot, dusty, physically demanding. And visual inspection only catches obvious failures. A bag with a pinhole leak or a poorly seated snap band will pass visual inspection while still contributing to elevated emissions.
The biggest problem is accuracy. Studies have shown that manual visual inspection misses up to 30-40% of actual leak points, particularly small leaks that don't leave an obvious dust trail on the clean side.
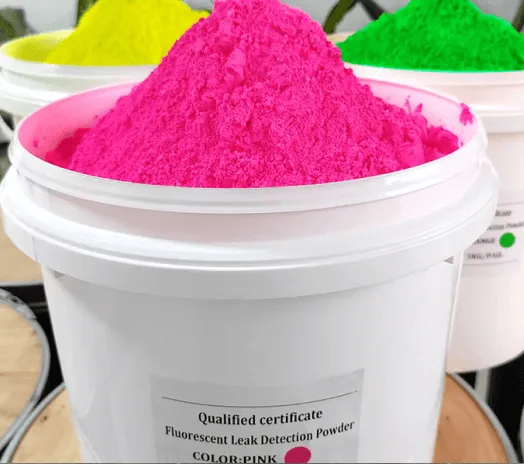
THE FAST WAY: FLUORESCENT POWDER LEAK TESTING
Fluorescent powder testing — sometimes called UV powder testing or tracer powder testing — is the fastest and most accurate method available. It finds virtually 100% of leak points in under 2 hours, including leaks that are completely invisible to the naked eye.
Here's how it works.
Step 1: Shut down the compartment and turn off the cleaning system. The pulse valves must not fire during the test — you need the powder to travel through the system and accumulate at leak points, not get pulsed off.
Step 2: With the fan running at 60-80% of normal operating speed, introduce a measured quantity of fluorescent tracer powder into the dirty air side of the baghouse. The powder is ultra-fine and travels with the airstream, passing through any leak point just like process dust would.
Step 3: After the powder has circulated for a set period (typically 10-15 minutes), shut down the fan and enter the clean side of the baghouse with a UV lamp (blacklight).
Step 4: In the darkness of the baghouse interior, the UV lamp causes any fluorescent powder that leaked through to glow brightly — green, yellow, or orange depending on the powder type. Leak points light up immediately and unmistakably. Even a pinhole that would be completely invisible under normal lighting becomes a glowing beacon.
Step 5: Mark every leak location, record the bag position numbers, and photograph the results for your maintenance records.
The entire process — from powder introduction to completed inspection report — takes about 2 hours for a typical compartment. Compare that to 2-3 days for manual inspection, with far better accuracy.
HOW MUCH POWDER DO YOU NEED?
The standard dosage is approximately 5 grams per square meter of filter area. The formula is simple:
Powder needed (kg) = Bag diameter (m) × 3.14 × Bag length (m) × Number of bags ÷ 200
For example, a compartment with 1,000 bags at 130mm diameter × 6,000mm length:
0.13 × 3.14 × 6 × 1,000 ÷ 200 = 12.3 kg
Round up to the nearest full container. It's better to use slightly more than slightly less — insufficient powder can miss small leaks.
WHAT LEAK POINTS DOES IT FIND?
Fluorescent powder testing doesn't just find torn bags. It identifies every type of leak in the system:
Bag failures — holes, tears, abrasion wear, seam failures, chemical degradation spots that have weakened to the point of leaking.
Snap band or cuff seal failures — bags that aren't properly seated in the tube sheet. This is one of the most common leak sources after a bag change-out and is virtually impossible to detect visually from outside the bag.
Tube sheet gasket leaks — gaps between the tube sheet sections or around the perimeter seal.
Weld cracks in the housing — structural leaks in the baghouse casing that bypass the filter media entirely.
Bypass damper leaks — dampers that don't seal completely, allowing dirty gas to skip the filter section.
This comprehensive detection capability is what makes fluorescent testing so valuable. You're not just finding bad bags — you're finding every pathway that dust uses to reach the clean side.
WHEN SHOULD YOU TEST?
Schedule fluorescent powder leak testing in these situations:
After every new bag installation. This catches installation errors (improperly seated bags, damaged bags from handling) before they cause emission problems. Think of it as quality assurance for your bag change-out.
When emissions increase unexpectedly. Rather than guessing which bags might be leaking or pulling bags randomly for inspection, one fluorescent test tells you exactly where every leak is.
As part of routine preventive maintenance. Testing every 6 to 12 months establishes a baseline and catches developing problems before they become compliance events.
Before a scheduled compliance stack test. Running a leak test a week before your official emission test gives you time to fix any issues and go into the compliance test with confidence.
FLUORESCENT TESTING VS. MANUAL INSPECTION: SIDE BY SIDE
Detection accuracy: Fluorescent testing finds 99%+ of leak points. Manual inspection catches 60-70% at best.
Time required: Fluorescent testing takes about 2 hours per compartment. Manual inspection takes 2-3 days.
Personnel needed: Both methods require 2 people for a typical 500 square meter compartment.
Equipment needed: Fluorescent testing requires tracer powder, a UV lamp, and a powder delivery method. Manual inspection requires only a flashlight and experience.
Can detect pinhole leaks: Yes for fluorescent testing. No for manual inspection.
Can detect seal and gasket leaks: Yes for fluorescent testing. Rarely for manual inspection.
Cost: Fluorescent testing has a one-time material cost for the powder but saves significantly on labor hours. Manual inspection has lower material cost but much higher labor cost.
PRACTICAL TIPS
Keep the bypass damper fully closed during testing. If the bypass leaks, powder will escape without passing through the bags, and you'll get false results.
Ensure the pulse cleaning system is completely off. Any pulse firing during the test will blow powder off the bags and create false clean readings.
Use the right fan speed. Running at 60-80% of normal gives enough airflow to distribute the powder evenly without blowing it too hard through weak spots that might reseal under lower pressure.
Document everything. Photograph each leak point with the UV lamp, record the bag position number, and note the severity (bright glow = major leak, faint glow = minor seep). This data is invaluable for tracking bag degradation over time and planning future replacements.
THE BOTTOM LINE
If you're still relying on visual inspection to find leaking bags, you're spending more time, finding fewer leaks, and accepting higher emission risk than you need to.
Fluorescent powder leak testing is faster, more accurate, and more comprehensive. It's the standard method used by power plants, cement plants, steel mills, and waste incineration facilities worldwide — and for good reason.
The powder costs a fraction of what a single compliance violation costs. The test takes hours instead of days. And it finds leaks that no amount of visual inspection will ever catch.
If your baghouse hasn't been tested recently, it's worth scheduling one before your next compliance event.